About paper
Czech originalSome Border Experiments
This report introduces some experiments on the border between physics, chemistry and biology which are useful for the development of correlation of subjects.
The Force of Crystal Structure1
Equipment:
A beaker (250 ml), rock salt (NaCl), a cooker, various cotton threads, clothespins, little lightweight objects (earrings, paperclips), scissors, a suitable stand, a spoon, matches
Operating procedure:
Switch on the cooker and put the beaker filled up to two thirds with water on it. Stir in the rock salt slowly until reaching a saturated solution. Cut 35 – 40 cm long cotton threads, make a loop on one end of each and dip them into the saturated salt solution. Let them boil for approximately 5 minutes. Pull out the threads slowly after given time interval, hang them onto the stand and fix with clothespins. Mind that loops are hanging downside. Let individual threads dry. Hang lightweight objects on the loops (big nacre earrings did well for me) after the threads become dry. Ignite cotton threads with matches. Observe that the cotton thread has burned away but the earring is still hanging.
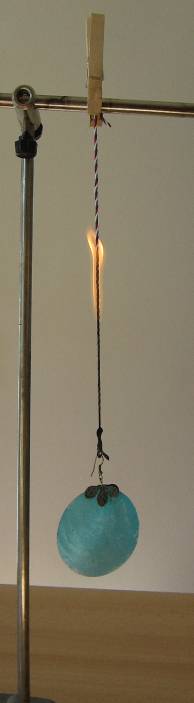
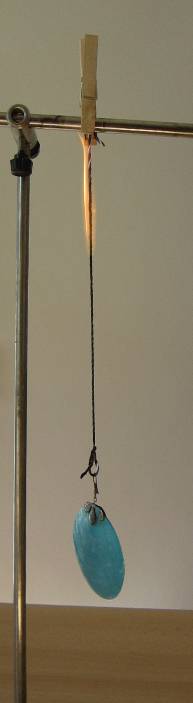
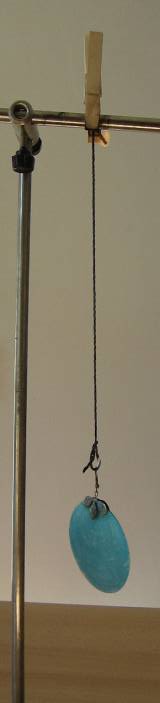
Fig. 1 The progress of the experiment The Force of Crystal Structure
Explanation:
Rock salt (halite) or sodium chloride crystallizes in cubic crystal structure. The salt contained in the solution, in which the threads were boiled, crystallized among and along individual cotton fibres of each thread. Crystal structure of sodium chloride has such strength that it does not only conserve its own shape but even can carry a little lightweight object after the cotton thread has burned away. However, it is enough to slightly touch the crystalline thread (the structure of crystals along the former cotton thread) and it falls apart into little fragments.
Tips:
It is very important that the cotton thread is dried well. Try different diameters of cotton threads; generally, the larger diameter of the thread, the heavier weight can it carry. The experiment can be improved with hanging one thread boiled in the salt solution and one ordinary thread next to it - they are indistinguishable at first sight. Let students guess why one cotton thread burns apart immediately after it starts burning while the other does not.
Several Experiments with Surface Tension
Oil at the bottom
Equipment:
A graduated cylinder, vegetable oil, red ink, a piece of thread, water, a suitable glass vial with a narrow neck (the bottom part of a pycnometer), detergent, a small sealable bottle
Technique:
Dye the vegetable oil first so that the experiment can be seen well. Pour some vegetable oil into the sealable bottle and add a few drops of red ink, close the bottle and shake its content. Fill the glass graduated cylinder up to three quarters with water. Bind an approximately 30 cm long thread to the narrow-necked glass vial (the bottom part of a pycnometer with a volume of 25 cm3 did well for me). Fill the narrow-necked vial with the dyed vegetable oil and wipe eventual drops. Take the thread in your hand and dip the vial with the vegetable oil slowly on the thread down to the bottom of the graduated cylinder. Observe that although the oil is less dense than water it remains inside the bottle. Pour a few drops of any detergent into the graduated cylinder then. A change is evident almost immediately. Watch how the oil ascends slowly through the water column inside the graduated cylinder up.
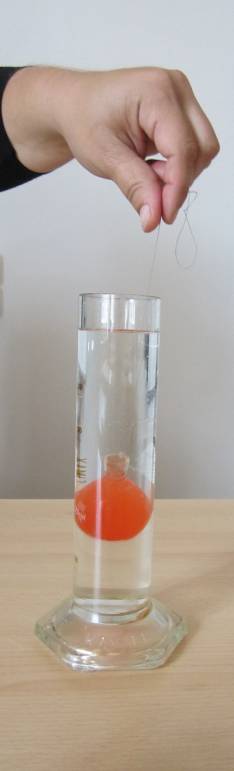
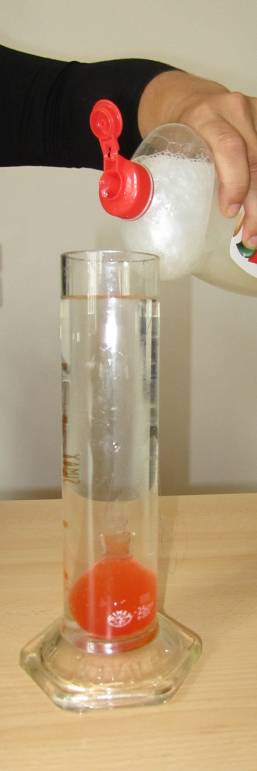
Fig. 2 Preparation of the experiment
Explanation:
The oil remains inside the bottle due to surface tension of water which acts on the surface of oil. Detergents, also called surfactants, are organic substances capable to cumulate themselves already at a low concentration at the phase interface and decrease the inter-phase energy of the system. This means that they lower the surface tension of solvents (water in our case) and facilitate wetting of surfaces of different materials. The dyed oil which has been held inside the vial by the surface tension up to now begins to ascend to the surface due to its lower density.
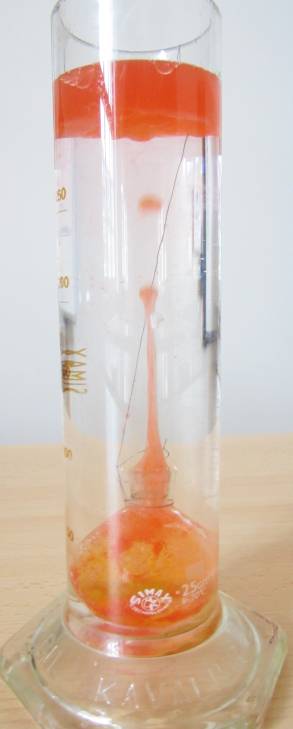
Fig. 3 The oil ascends up
Pepper on the Surface
Equipment:
A larger Petri dish, a skewer, detergent, ground pepper, water
Technique:
Fill the Petri dish with water. Gently sprinkle ground pepper on the surface of water in the Petri dish. Tap the middle of the water surface with a dry skewer and watch what happens. Soak the skewer in detergent and tap the middle of the water surface gently again. The ground pepper runs to the edges of the Petri dish.
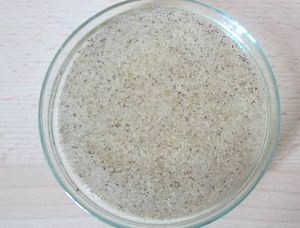
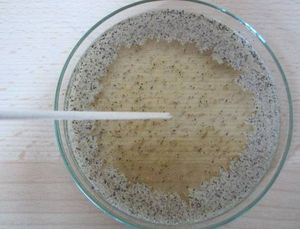
Fig. 4 The progress of the experiment Pepper on the Surface
Explanation:
As soon as the middle of the water surface is tipped with the skewer with detergent the surface tension is lowered at the spot of contact but not on the whole water surface. The water still has high surface tension further from the detergent and it “pulls” the pepper away from the source of the detergent.
Tips:
You do not need to use the skewer for this experiment, your finger is sufficient.
Sulphur on the Surface2
Equipment:
A taller glass beaker, finely ground sulphur, detergent, water, a skewer
Technique:
Fill the taller glass beaker with water. Dust the water surface in the beaker with ground sulphur. Soak a skewer in detergent and lightly tap the water surface near the edge of the beaker. The ground sulphur begins to fall from the place tapped with the skewer to the bottom of the glass beaker.
Explanation:
Sulphur has higher density than water. The finely ground sulphur floats on the surface of water thanks to the high surface tension of water and thanks to the hydrophobic effect of finely ground sulphur against water. However, if the surface tension of water is lowered by the detergent, water begins to behave wettably to sulphur and sulphur sinks to the bottom of the beaker.
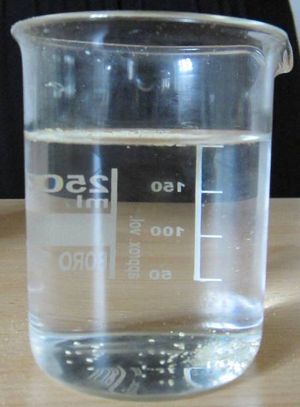
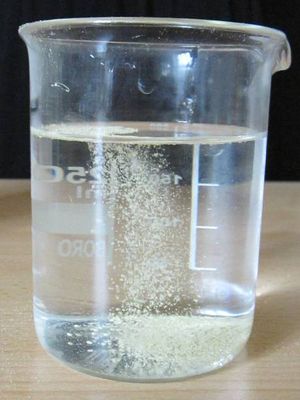
Fig. 5 The progress of the experiment Sulphur on the Surface
Coca-cola: Protection against Corrosion?3
Equipment:
Coca-Cola, two equal beakers, two rusty nails, water
Technique:
Fill the first beaker up to three quarters with Coke and the other to the same level with water. Place one rusty nail to each beaker. Let them stand for 24 hours. You can see 24 hours later that the nail standing in water is rusty much more than the day before whereas the nail standing in Coke shows no sign of corrosion.
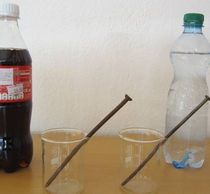
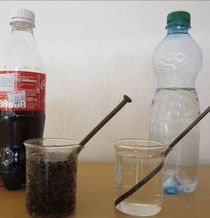
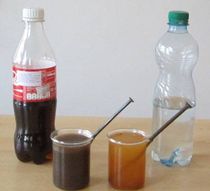
Fig. 6 The progress of the experiment Coca-cola: Protection against Corrosion?
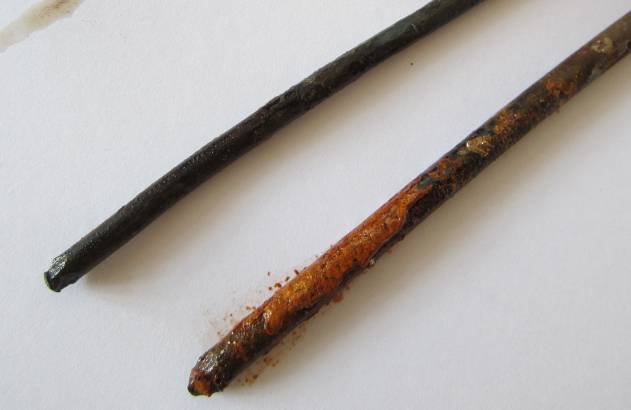
Fig. 7 Details of nails (left: Coke, right: water)
Explanation:
One of the components of Coca-Cola is phosphoric acid (H3PO4) that reacted with rust (ferric oxide – Fe2O3) and formed vivianite Fe3(PO4)3·8(H2O) on the surface of the nail. We can say that Coke is one of the cheapest anticorrosion agents. Coke used to be used for polishing of chrome-plated car bumpers in the past.
Luterature
[1] http://files.projekt5p.cz/200000605-7629a77236/Zajimave_experimenty_18.5.2011.pdf
[2] http://dwb.unl.edu/chemistry/dochem/DoChem068.html
[3] RENTZSCH, Werner. Experimente mit Spass. 1, Wärme. 2. unveränderte Aufl. Köln: Aulis Verlag Deubner, 2007. 120 s. ISBN 978-3-7614-2069-0.